Box Layout
In this box layout tutorial, you will learn how to build a C# Gtk Application that makes use of the box layout to display multiple widgets both vertically and horizontally.
You will also learn how to use a box layout to display an icon and a label inside a Gtk.Button widget.
We will begin by going to the GtkTutorials directory in the terminal. This directory was created in the previous Hello World tutorial. If you have not done that tutorial then you can follow that tutorial to get the directory structure set up for following this tutorial series.
Now run the following commands.
dotnet new console -f net8.0 -o BoxLayout
dotnet sln add BoxLayout/
cd BoxLayout
dotnet add package GirCore.Gtk-4.0
With these commands you created a new BoxLayout project, added it to the sln file for people who use IDEs and added the Gir.Gtk-4.0 package to the project.
We will now create a new class file to make the BoxLayout window in Gtk. This will be loaded from the Program.cs file and will be the main window of the application.
dotnet new class -n BoxLayout
Now open the BoxLayout directory in your favourite code editor or ide so we can edit the project files.
Note
The code is commented to tell you what is happening. In addition to these comments, the highlighted lines will be discussed further after the code block to give you more information.
Filename: Program.cs
// Create a new GTK application instance.
// "com.example.boxlayout" is the unique application ID used to identify the app.
// The application ID should be a domain name you control.
// If you don't own a domain name, you can use a project-specific domain such as GitHub pages.
// e.g. io.github.projectname
// Gio.ApplicationFlags.FlagsNone indicates no special flags are being used.
var application = Gtk.Application.New("com.example.boxlayout", Gio.ApplicationFlags.FlagsNone);

// Attach an event handler to the application's "OnActivate" event.
// This event is triggered when the application is started or activated.
application.OnActivate += (sender, args) =>
{
    // Create a new instance of the main application window.
    // The application variable storing the Gtk.Application instance is passed to
    // the new instance of the BoxLayout window so that the window can access the
    // Gtk.Application instance, this is useful for closing the application from
    // a button.
    var window = BoxLayout.BoxLayout.New();

    // Set the "Application" property of the window to the current application instance.
    // This links the window to the application, allowing them to work together.
    window.Application = (Gtk.Application) sender;

    // Show the window on the screen.
    // This makes the window visible to the user.
    window.Show();
};

// Start the application's event loop and process user interactions.
// RunWithSynchronizationContext ensures proper thread synchronization for GTK.
// The "null" parameter takes the arguments from the commandline. As there are no arguments
// supported in this tutorial the parameter is not filled and thus null.
return application.RunWithSynchronizationContext(null);
You will notice that the Program.cs file is almost identical to the one in the previous Hello World tutorial. The Program.cs file is usually the same boilerplate code that loads the window to display and the only changes are on the highlighted lines 7 and 18.
Line 7:
var application = Gtk.Application.New("com.example.boxlayout", Gio.ApplicationFlags.FlagsNone);
On line 7 we changed the application id which is the reverse dns domain com.example.boxlayout this will be unique for each application and should be a domain you own. If you do not own a domain then you can use a project specific domain like io.github.projectname that is unique to your project.
Line 18:
var window = BoxLayout.BoxLayout.New();
On line 18 we changed the window class that is being used to display the window which in this case is BoxLayout.BoxLayout this is namespace.class_name. We are also passing in a Gtk.Application argument with the variable application which is the instance of Gtk.Application which is being used for this Gtk Application we are building.
By passing the Gtk.Application instance to the BoxLayout object we will have access to things in Gtk.Application from the window created by the BoxLayout class, this is useful for adding menus, quit buttons etc.
Now that the Program.cs file is setup we need to build the window for the application. We will do this by adding the following code to the BoxLayout.cs file.
Note
The code is commented to tell you what is happening. In addition to these comments, the highlighted lines will be discussed further after the code block to give you more information.
Filename: BoxLayout.cs
namespace BoxLayout
{
    // Define a class named BoxLayout that extends Gtk.Window.
    // Gtk.Window represents a top-level window in a GTK application.
    // Subclassing requires a source generator to integrate deeply with
    // the GObject type system.
    [GObject.Subclass<Gtk.Window>]
    public partial class BoxLayout
    {
        public static new BoxLayout New()
        {
            return NewWithProperties([]);
        }

        // Initializer for the BoxLayout class.
        // This method sets up the window and its contents.
        // Gtk.Application is passed in so we can access the application in this app
        // we will use the reference to the Gtk.Application to quit from a button.
        partial void Initialize()
        {
            Title = "Box Layout App";
            SetDefaultSize(300, 30);

            var helloButton = Gtk.Button.New();
            helloButton.Label = "Say Hello"; // Same as helloButton.SetLabel("Say Hello")
            helloButton.SetMarginStart(10);  // Left margin
            helloButton.SetMarginEnd(10);    // Right margin
            helloButton.SetMarginTop(10);    // Top margin
            helloButton.SetMarginBottom(10); // Bottom margin

            // Create a Gtk.Button widget and set the label when it is created
            var goodbyeButton = Gtk.Button.NewWithLabel("Say Goodbye");
            goodbyeButton.SetMarginStart(10);  // Left margin
            goodbyeButton.SetMarginEnd(10);    // Right margin
            goodbyeButton.SetMarginTop(10);    // Top margin
            goodbyeButton.SetMarginBottom(10); // Bottom margin

            // A Gtk.Button can only display a Label or an Icon but not both together
            // Gtk.Button with label: var button = Gtk.Button.NewWithLabel("Label");
            // Gtk.Button with icon: var button = Gtk.Button.NewFromIconName("icon-name");
            // To have multiple widgets inside a Gtk.Button you can set the child of the
            // button to be a Gtk.Box as shown below.
            var quitButton = Gtk.Button.New();
            // Create a Gtk.Box that can hold multiple widgets. Orientation is set
            // to horizontal which will display widgets side by side.
            // there is a 10px gap between each new widget in the box.
            var quitBox = Gtk.Box.New(Gtk.Orientation.Horizontal, 10);
            // Create a label that allows user to press Alt+Q to act as button press.
            var quitLabel = Gtk.Label.NewWithMnemonic("_Quit");
            // Icon Names come from https://specifications.freedesktop.org/icon-naming-spec/latest/
            // The theme needs to have the icon. Gtk Apps by default use the Adwaita theme from Gnome
            var quitIcon = Gtk.Image.NewFromIconName("application-exit");
            // This will add the quitIcon and quitLabel widgets into the quitBox.
            quitBox.Append(quitIcon);
            quitBox.Append(quitLabel);
            // Sets the quitBox as the child of the quitButton so that the contents
            // of the quitBox will display inside the button.
            quitButton.SetChild(quitBox);
            quitButton.SetMarginStart(10);  // Left margin
            quitButton.SetMarginEnd(10);    // Right margin
            quitButton.SetMarginTop(10);    // Top margin
            quitButton.SetMarginBottom(10); // Bottom margin

            // Create a Gtk.Label with a blank label
            var sayLabel = Gtk.Label.New("");
            sayLabel.SetMarginStart(10);  // Left margin
            sayLabel.SetMarginEnd(10);    // Right margin
            sayLabel.SetMarginTop(10);    // Top margin
            sayLabel.SetMarginBottom(10); // Bottom margin

            // Create a Gtk.Entry and then set placeholder text telling the user
            // what they need to do.
            var nameEntry = Gtk.Entry.New();
            nameEntry.PlaceholderText = "Enter your name";
            nameEntry.SetMarginStart(10);  // Left margin
            nameEntry.SetMarginEnd(10);    // Right margin
            nameEntry.SetMarginTop(10);    // Top margin
            nameEntry.SetMarginBottom(10); // Bottom margin

            // Creates a Gtk.Box widget with a vertical orientation.
            // This will allow you to add multiple widgets stacked vertically
            // with each new appended widget stacking below the widget above it.
            var vBox = Gtk.Box.New(Gtk.Orientation.Vertical, 0);

            // Creates a Gtk.Box widget with a horizontal orientation.
            // This will allow you to add multiple widgets stacked horizontally
            // with each new appended widget stacking to the right of the widget
            // beside it.
            var hBox = Gtk.Box.New(Gtk.Orientation.Horizontal, 0);

            // Creates a Gtk.Box widget with a vertical orientation.
            // Then the SetVexpand is set to true so the widget takes up all the
            // available vertical space between the widgets above it and below it.
            // This is useful to make the widgets below the spacer be at the bottom
            // of the window even when it is resized to be larger or smaller.
            var vSpacer = Gtk.Box.New(Gtk.Orientation.Vertical, 0);
            vSpacer.SetVexpand(true);

            // Creates a Gtk.Box widget with a horizontal orientation.
            // Then the SetHexpand is set to true so the widget takes up all the
            // available horizontal space between the widgets to the left and
            // the widgets to the right of it.
            // This is useful to make the widgets to the right of the spacer be
            // at the right of the window even when it is resized to be larger
            // or smaller.
            var hSpacer = Gtk.Box.New(Gtk.Orientation.Horizontal, 0);
            hSpacer.SetHexpand(true);

            // This will add the widgets to the vBox Gtk.Box widget with each new
            // append adding the new widget below the one above it.
            vBox.Append(sayLabel);
            vBox.Append(nameEntry);
            // The vSpacer is used to create a gap between the widgets above and
            // below the vSpacer. It will force the widgets in the hBox to be at
            // the bottom of the window.
            vBox.Append(vSpacer);
            vBox.Append(hBox);

            // This will add the widgets to the hBox Gtk.Box widget with each new
            // append adding the new widget to the right of the one beside it.
            hBox.Append(helloButton);
            hBox.Append(goodbyeButton);
            // the hSpacer is used to create a gap between the widgets to the left
            // and the widgets to the right of the hSpacer. It will force the
            // quitButton to be at the right of the window.
            hBox.Append(hSpacer);
            hBox.Append(quitButton);

            // This sets the child of the window to be the vBox Gtk.Box widget.
            // This will show all the widgets in the vBox in the window.
            Child = vBox;

            helloButton.OnClicked += (_, _) =>
            {
                // Sets the label to say Hello and then the value the user typed
                // into the nameEntry widget.
                sayLabel.SetLabel($"Hello {nameEntry.GetText()}");
            };

            goodbyeButton.OnClicked += (_, _) =>
            {
                // Sets the label to say Goodbye and then the value the user typed
                // into the nameEntry widget.
                sayLabel.SetLabel($"Goodbye {nameEntry.GetText()}");
            };

            quitButton.OnClicked += (_, _) =>
            {
                Application?.Quit();
            };
        }
    }
}
Line 32:
var goodbyeButton = Gtk.Button.NewWithLabel("Say Goodbye");
On line 32 you will see that we are adding a Gtk.Button widget and using the NewWithLabel() method to create the Gtk.Button without having to use goodbyeButton.SetLabel("Button Label"); or goodbyeButton.Label = "Button Label"; after the button is declared.
Line 47:
var quitBox = Gtk.Box.New(Gtk.Orientation.Horizontal, 10);
On line 47 we are adding a Gtk.Box which is used to display multiple widgets at the same time. In this instance, we are using it to show both an Icon and a Label inside the Gtk.Button widget that is being used as a quit button.
We are setting Gtk.Orientation.Horizontal which will make the widgets appear side by side with each new widget being added at the end.
The value 10 is the gap in pixels that is between each widget that is added to the Gtk.Box.
Example of Gtk.Box with horizontal orientation and 3 widgets inside:
graph TD
    parent[Gtk.Box Widget]
    subgraph parent[Gtk.Box Widget]
        box1[Widget]
        box2[Widget]
        box3[Widget]
    end
Example of Gtk.Box with vertical orientation and 3 widgets inside:
graph TB
    parent[Gtk.Box Widget]
    subgraph parent[Gtk.Box Widget]
        box1[Widget]
        box2[Widget]
        box3[Widget]
    end
Line 49:
var quitLabel = Gtk.Label.NewWithMnemonic("_Quit");
On line 49 we are creating a Gtk.Label to use as a label on our quit button. We are using the NewWithMnemonic() method to create a label that has the mnemonic Alt+Q which will act as the button being clicked when the user presses Alt+Q.
Line 52:
var quitIcon = Gtk.Image.NewFromIconName("application-exit");
On line 52 we are creating a Gtk.Image to use as an icon for our quit button. We are using the NewFromIconName() method to assign the icon application-exit when declaring the quitIcon variable.
Note
application-exit is an icon name that is part of the Free Desktop Icon Theme Specification and is used by many desktop environments. If Gtk cannot find the icon name then it will show a broken image icon to indicate it could not find the icon.
The Icon Library application can be used to browse and search icons. You can click icons to get additional information and it shows a sample of how to add the icon as a gresource to an application in multiple programming languages. The application can be downloaded from FlatHub or installed using your linux distributions package manager, usually, the package will be called icon-library.
Gtk Applications use the Adwaita icon theme by default. If you are not seeing the icons make sure that you have the theme installed. The theme package is usually called adwaita-icon-theme and can be installed using your package manager on Linux, Home Brew on MacOS and MSYS2 on Windows.
Lines 54 and 55:
quitBox.Append(quitIcon);
quitBox.Append(quitLabel);
On lines 54 and 55, we are appending the quitIcon and quitLabel widgets to the quitBox. As this is a Gtk.Box with a horizontal orientation the widgets will be shown side by side.
Line 58:
quitButton.SetChild(quitBox);
On line 58 we are setting the quitButton child to be the quitBox which will show the contents of the quitBox Gtk.Box inside the quitButton Gtk.Button widget.
quitButton Gtk.Button child is now the quitBox Gtk.Box widget:
graph TB
    parent[quitButton Gtk.Button]
    subgraph parent[quitButton Gtk.Button]
        subparent[quitBox Gtk.Box]
        subgraph subparent[quitBox Gtk.Box]
            nested1[quitIcon Gtk.Image]
            nested2[quitLabel Gtk.Label]
        end
    end
Tip
Append adds widgets to the end of the Gtk.Box and Prepend adds widgets to the start of the Gtk.Box. Try experimenting with the code by changing the code to be as shown below and notice how the order of the quitIcon and quitLabel change position.
quitBox.Prepend(quitIcon);
quitBox.Prepend(quitLabel);
Lines 96 and 97:
var vSpacer = Gtk.Box.New(Gtk.Orientation.Vertical, 0);
vSpacer.SetVexpand(true);
On line 96 we are making the vSpacer variable be an empty Gtk.Box widget with vertical orientation. This will be used to create blank space between the widgets at the top of the window and the widgets at the bottom of the window. We need to do this so that the widgets at the bottom of the window remain at the bottom when the window is resized.
On line 97 we use SetVexpand(true) to make the vSpacer Gtk.Box widget expand to take up all available space. By doing this the vSpacer Gtk.Box widget will push all widgets after it to the bottom of the window.
Lines 106 and 107:
var hSpacer = Gtk.Box.New(Gtk.Orientation.Horizontal, 0);
hSpacer.SetHexpand(true);
On line 106 we are making the hSpacer variable be an empty Gtk.Box widget with horizontal orientation. This will be used to create blank space between the widgets at the start (left) of the window and the widgets at the end (right) of the window. We need to do this so that the widgets at the end of the window remain at the end when the window is resized.
On line 107 we use SetHexpand(true) to make the hSpacer Gtk.Box widget expand to take up all available space. By doing this the hSpacer Gtk.Box widget will push all widgets after it to the end (right) of the window.
Line 131:
Child = vBox;
On line 131 you set the Child of the BoxLayout Gtk.Window widget to be the vBox Gtk.Box widget which makes the BoxLayout Gtk.Window have everything that is inside the vBox Gtk.Box widget.
The BoxLayout Gtk.Window contents after making vBox the Child:
graph TB
    parent
    subgraph parent[BoxLayout Gtk.Window]
        subgraph vBox Gtk.Box[vBox Gtk.Box]
            n1[sayLabel Gtk.Label]
            n2[nameEntry Gtk.Entry]
            n3[vSpacer Gtk.Spacer]
            n4[hBox Gtk.Box]
            subgraph n4 [hBox Gtk.Box]
                direction TB
                n5[helloButton Gtk.Button]
                n6[goodbyeButton Gtk.Button]
                n7[hSpacer Gtk.Spacer]
                n8[quitButton Gtk.Button]
            end
        end
    end
    n1 ~~~ n2
    n2 ~~~ n3
    n3 ~~~ n4
Line 149:
Application?.Quit();
On line 149 you will see that we access the Gtk.Application instance. This will give us access to the running Gtk.Application and is useful for things like adding a quit button, adding menu item actions etc.
Run The BoxLayout Application:
Now that you have entered the code needed for the application you can run the project.
dotnet run
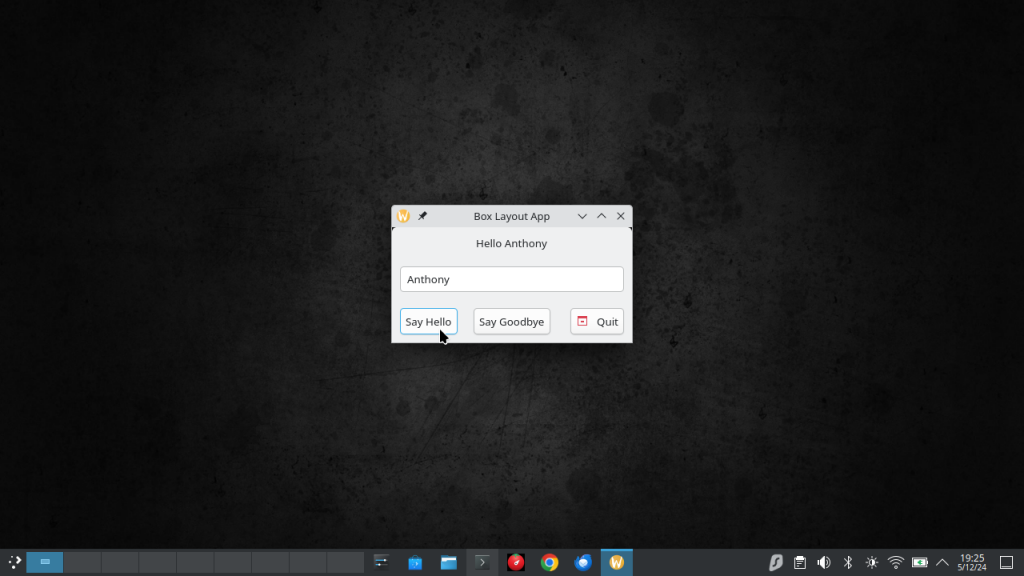
If you have entered the code correctly and have the Gtk 4 runtime libraries installed correctly on your computer then you will see the Box Layout application window appear on the screen.
Tip
Try resizing the window and see how the vSpacer and hSpacer widgets push the widgets to the bottom and right sides of the window.
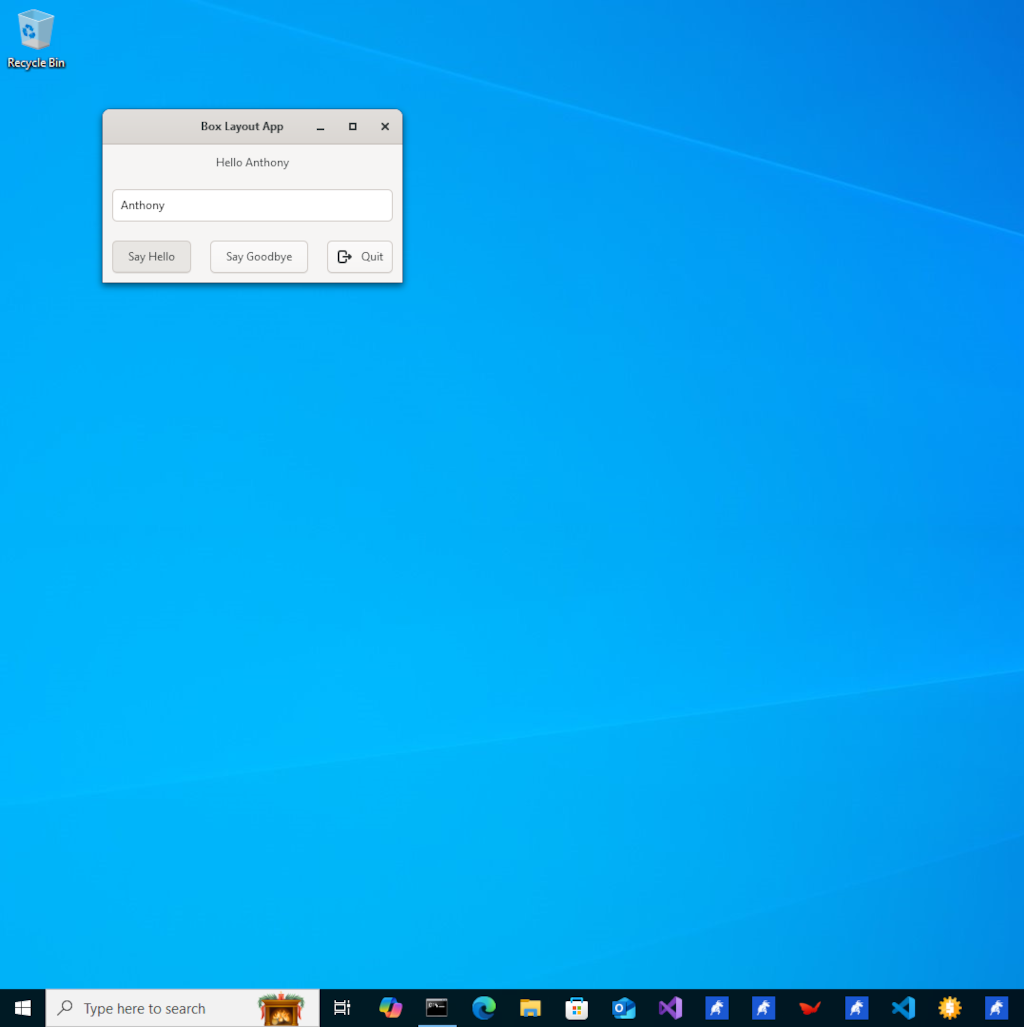
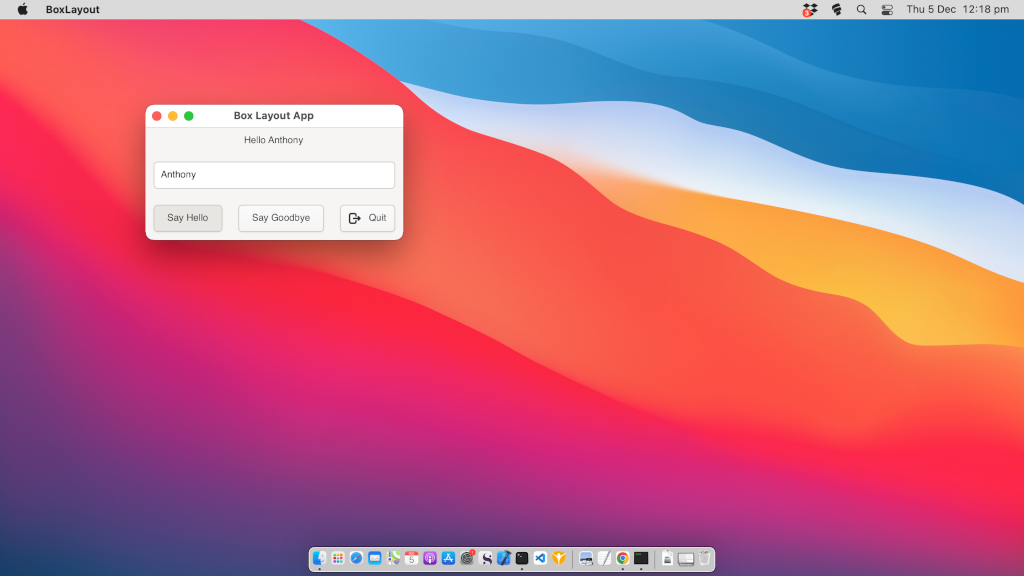
Below are screenshots of the Box Layout application running on Linux, Windows and MacOS.